
The Hunter’s Star quilt is a timeless classic that looks incredibly intricate but is surprisingly simple to make, making it perfect for beginners and experienced quilters alike. It’s a project I’ve been wanting to do for a while now.
How to Make a Hunter’s Star Quilt
To make this 72” x 72” square quilt, you will create 36 blocks (12” finished) using Half-Square Triangles (HSTs) and solid squares. By rotating two specific HST units and pairing them with solid purple and white squares, you form the iconic star points. It requires 288 HSTs and 72 large squares.

Quilt Measures : approx. 72″ x 72″
Tools We Used
Olfa Rotary Cutter 60mm
Olfa Rotary Cutter 45mm
Creative Grids Quilting Ruler
Creative Grids Half Square Triangle Ruler
OlfaCutting Mat
Cricut Self Healing Grey Mat
Blade Saver Thread Cutter
EQ8 Quilting Software
Panasonic Cordless Iron
Juki 2010QP Sewing Machine
Flexispot Pro Sit/Stand Desk
You can also find our updated favourite quilting tools on our Quilting Tools We Use page.
Watch the video tutorial below or scroll down for written instructions
(Can’t see the video? You may have an ad blocker installed. You can watch the video on our YouTube channel here.)
Fabric Requirements
This design uses a striking two-color palette. For this tutorial, we are using Purple and White. The white is a generic white fabric that we purchased at our local Spotlight store and the purple is from the Emily Belle range by Liberty.
- Purple Fabric – 3 yards
- White Fabric – 3 yards
Cutting Instructions
WOF = Width of Fabric
- Large Squares – White – Cut 6 strips @ 6 ½” x WOF. Sub-cut each strip into 6 ½” squares.
- Large Squares – Purple – Cut 6 strips @ 6 ½” x WOF. Sub-cut each strip into 6 ½” squares
- HST Units – White – Cut 15 strips (see Pro-Tip below before cutting) @ 4″ x WOF. Sub-cut each strip into 4” squares for 144 squares.
- HST Units – Purple – Cut 15 strips (see Pro-Tip below before cutting) @ 4″ by WOF. Sub-cut each strip into 4” squares for 144 squares.
Pro Tip: The “Waste-Not” Fabric Save (Also watch video above for more detail on this.)
- To maximize your fabric, start by cutting only 14 strips (instead of 15) for your 4” squares. Before reaching for more yardage, check the off-cuts from the strips you have already cut.
- The Goal: Try to sub-cut your final 4 extra purple and 4 extra white squares from those off-cuts first.
- The Backup: If your off-cuts are too narrow, simply cut one additional 4” x WOF strip from each color to finish your set of 144 squares.
Written Instructions for the Hunter’s Star Quilt
- Prepare Your HST squares
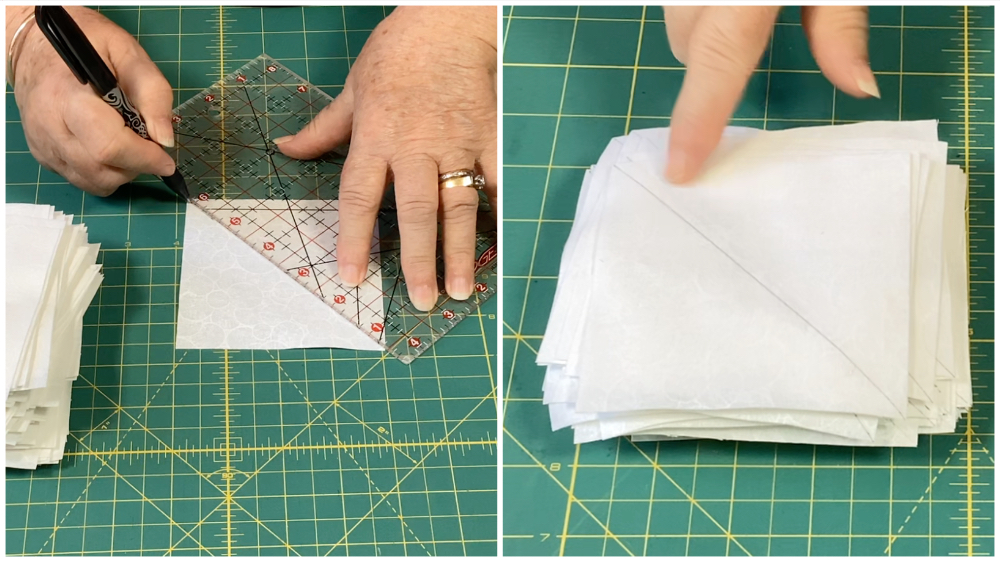
Take your 144 white 4” squares and, on the wrong side of the fabric, draw a diagonal line from corner to corner using a fabric pen (like a Frixion pen). This will serve as your sewing guide.

- Sew Half Square Triangles
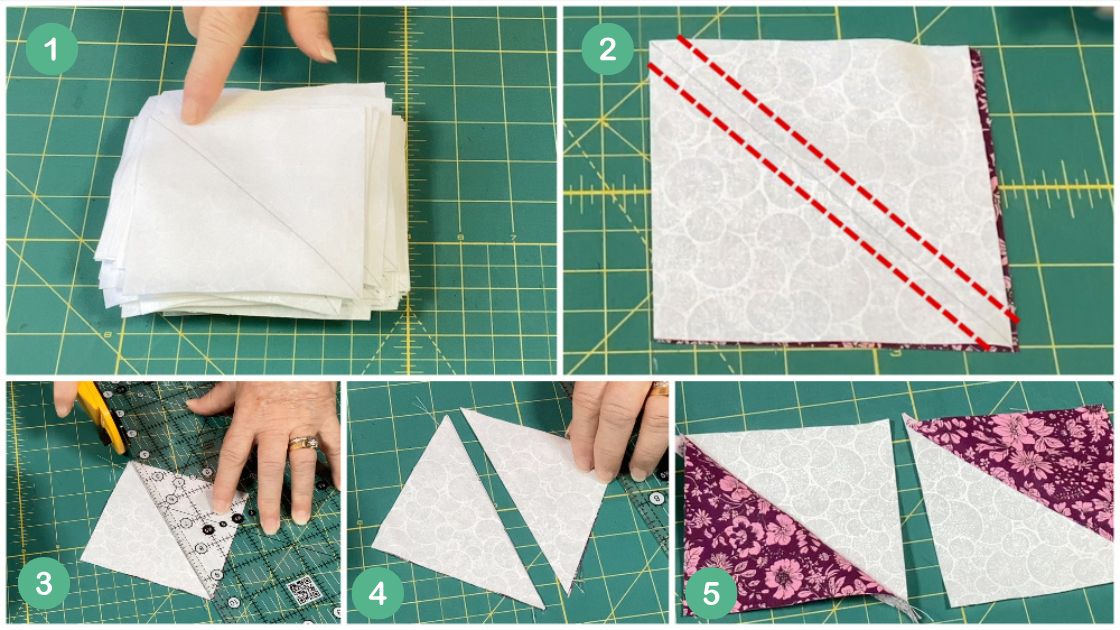
Place one white 4” square on top of a purple 4” square with right sides together.
Sew a ¼” seam on each side of the drawn line.
Cut directly along the drawn line to create two Half-Square Triangles.
Repeat for all 144 pairs to get 288 HSTs.
- Press Half Square Triangles
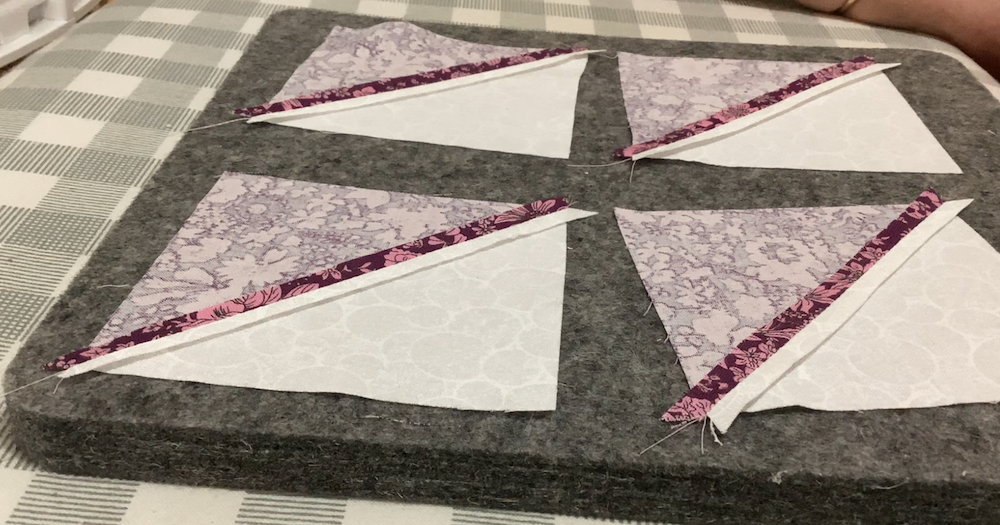
Press the seam for each half square triangle open.

- Trim Half Square Triangles
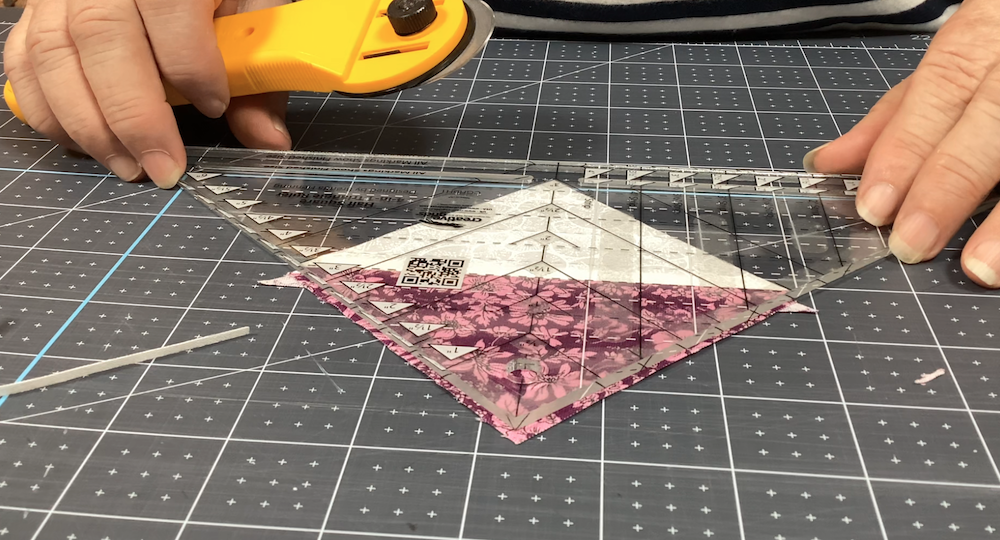
Trim each HST to exactly 3 ½” square.
Use whatever your favourite method is to trim your HST’s. I used a Creative Grids half square triangle ruler, however, here is a link on how to trim HST’s if you don’t have that ruler.
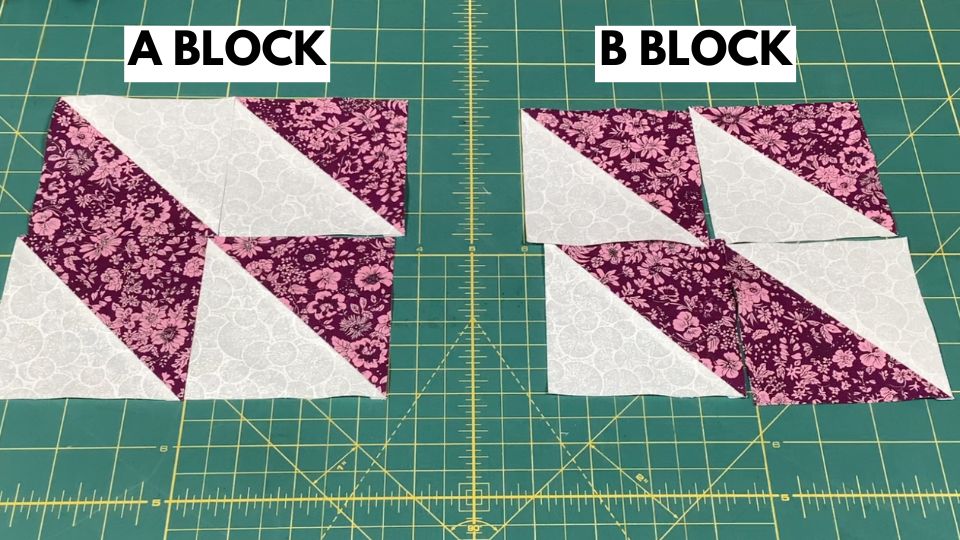
- Create BLOCK A and BLOCK B
Arrange 8 HST’S as shown in the image below.
Sew these blocks together using a ¼” seam.
You will need 36 of Block A and 36 of Block B. Keep them in separate piles so you know which is which.
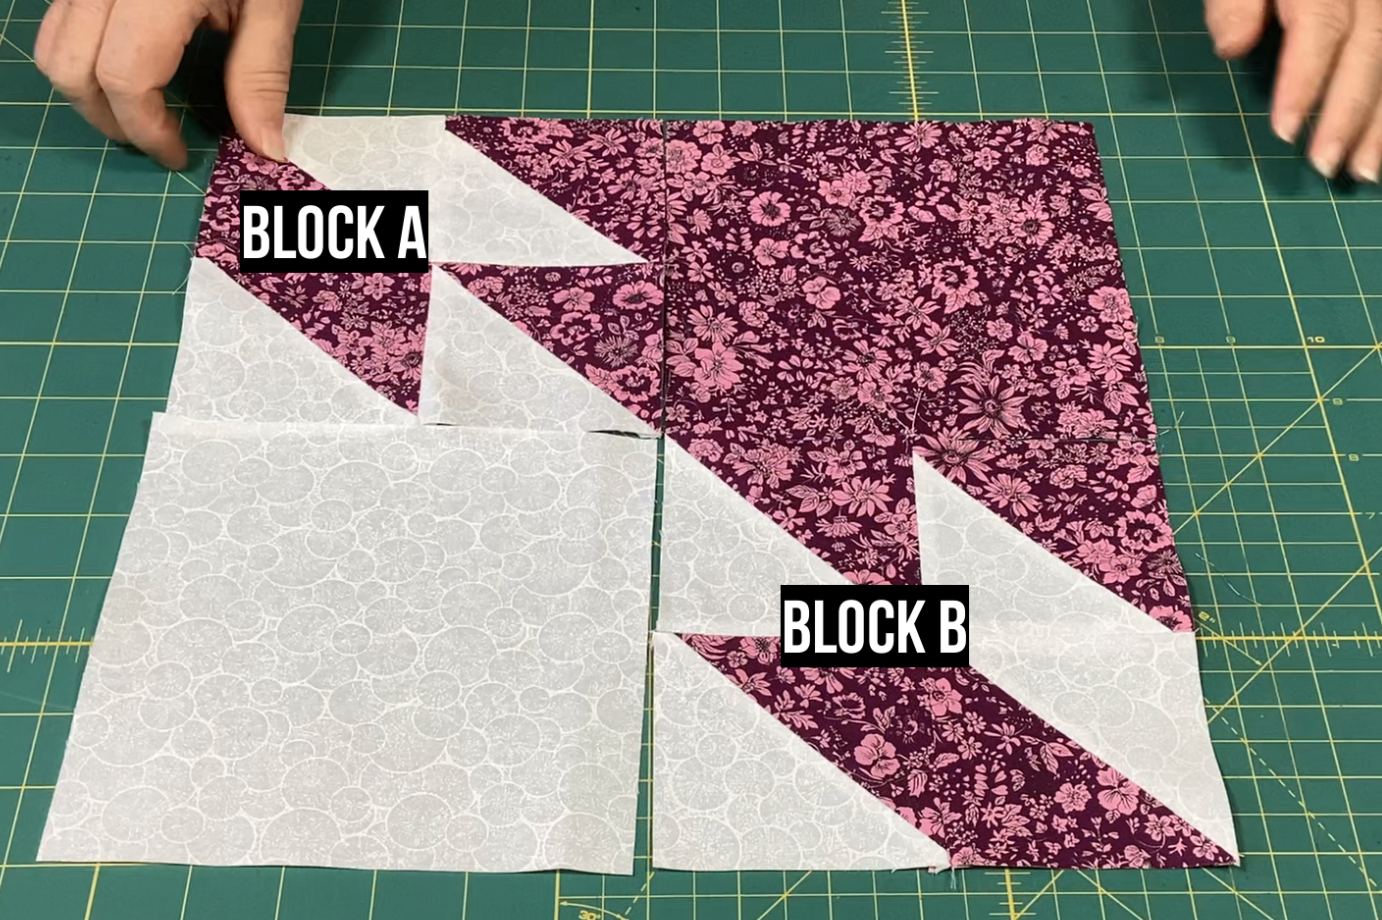
- Assemble the Main Block
Now, we are going to combine the half square triangle units with your large 6 ½” squares:
Lay out your pieces as per the image below.
Sew together to form the block.
Repeat with all of the pieces to form 36 blocks in total.
- Form the Star Block
Lay out four of your completed 12 ½” blocks as per the image below.
Make sure to alternate your white and purple points that form the star.
Sew together to form the block and repeat with all remaining pieces to form 9 blocks in total.
- Complete the Quilt
Lay out the blocks on your design board or floor.
Sew the blocks into rows.
Sew the rows together to form the quilt
- Pro Tips for Efficiency & Accuracy
Chain Piecing: Don’t cut your thread between squares. Feed the pairs through the sewing machine one after another to save time.
Press Seams Open: This is the one time I have pressed the seams open. The Hunter’s Star has bulky intersections. Pressing seams open helps the block lie perfectly flat.
Use a Starch Pen: Run a line of “Mary Ellen’s Best Press” using a refillable paint pen filled with Best Press along your seams before ironing it really helps keep the seams flat..
The Painter’s Tape Hack: Place a piece of blue painter’s tape on your ruler just shy of the 4” mark. This allows you to line up your cuts instantly without searching for the tiny line every time.
Use a Specialized Ruler: I found that the Creative Grids HST ruler significantly sped up the trimming process and increased accuracy.

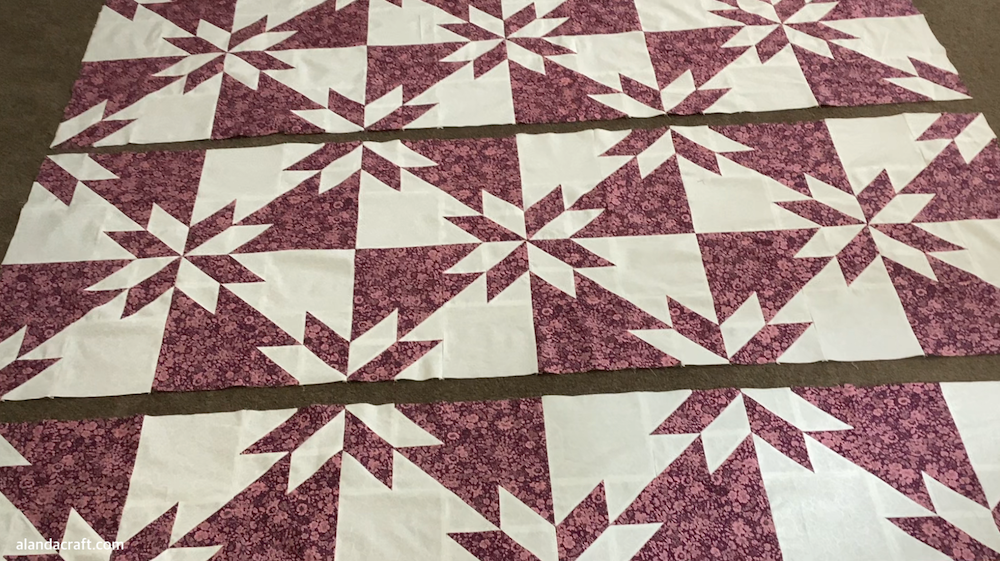
And here is the finished quilt. All you need to do now is decide whether or not you are going to add borders, add your backing and batting, have it quilted and finish off with your binding.
It’s such an easy quilt to make, it was just having to trim the 288 half square triangles that were a little time consuming. If you are making it in your own time it wouldn’t be an issue as you can take your time, get a couple of friends over for coffee and trim your HST’s while you chat.
But I do love this Hunter’s Star quilt and I’m glad we finally got around to making it. I have added another row of blocks to make it longer and I will probably add a border at a later stage.

Is the Hunter’s Star quilt hard to make?
It looks difficult, but it is actually a confident beginner project. If you can sew a straight line and trim a square accurately, you can make this quilt!
Precision is key. Ensure your HSTs are trimmed to exactly 3 ½” and your seam allowance is a consistent ¼”. Even a 1/8″ difference can throw off the points.
Absolutely! While the classic look uses two high-contrast fabrics, a “scrappy” Hunter’s Star can be beautiful as long as you maintain a “light” and “dark” value distinction.
This specific tutorial creates a 72” x 72” quilt top. You can easily make it larger by adding more rows or a decorative border.
You can either add more squares or you need to add borders. For a twin size you can just add borders. For a queen sized you would be better adding more squares then adding borders.


Pam Harper says
Wonderful instructions and the video takes all fear away of making this beautiful quilt!
Alanda Craft says
Thank you Pam.
Sherry Liss says
So glad to have found your video! I l0ve this star pattern. Thank you, from Alberta Canada.
Mary Martens says
I really like this pattern and I’m wondering if I can make the block bigger. I would like it to be 16 inches
What size would I cut the strips?
Sandy Stiffler says
Wow your website has a lot of pop up ads
Makes it hard to navigate
Where can I download the Hunter star pattern
Alanda Craft says
There is a PDF button at the bottom of the post Sandy. Its small, on the left hand side.
Sorry about the ads, we would rather not have any, but it’s how we keep the channel going and are able to provide free videos and step by step tutorial.
Laurie Masciovecchio says
How do I add backing and batting to the Hunter Star quilt?
Natalie Enteado says
if I wanted to use 2 colors for the stars what would I cut.
Melissa says
This quilt is beautiful and you make it look approachable for me. Thank you!
Alanda Craft says
Thank you Melissa 😊. The Hunters Star is a lovely quilt. You will be happy with how easy it is to make.